A step by step tutorial on how to paint rocks.
Note: This article was originally posted at tinyworlds.co.uk. I have received a number of requests for the information since it was removed.. so I have posted it here for posterity, although I have amended some of the paint names. It was the first tutorial over there so seems fitting that it is also the first tutorial here.
Hi there. Welcome to our first tutorial article in which we will be explaining one of the many possible ways to paint rocks.
One of the most common questions we are asked is how we paint the rocks on our bases and scenery. We paint a lot of stone type items and have developed a quick, easy technique for just this task which (we think) gives great, realistic results.
This technique is very simple, very fast and can be applied to all manner of gaming items including miniatures such as rock golems, bases for your miniatures, scenery such as walls, rocky outcrops, houses, cliffs etc.
Materials you will need:
Rocks – Whatever item you want to paint like stone (bases, walls, statues, houses, whatever). For our tutorial we will be using one of our 120mm rock bases. You can even paint rocks from your garden to make your own rock terrain.
Spray Primer – We used black but grey works well also. White is just harder to cover with the colours and techniques we’ll be using. If you have any brown primer such as Army Painter Oak Brown, this works nicely and saves you a step later.
Paints – We used a mix of Vallejo and some Citadel paints. We have included some conversions for other manufacturers. Substitute with whatever paints you have. Feel free to substitute cheap craft paints for larger projects. Colours used as follows:
- Dark Brown – Vallejo Charred Brown / Citadel Dryad Bark / Army Painter Oak Brown.
- Light Brown – Vallejo Earth / Citadel Steel Legion Drab.
- Medium Grey – Vallejo Cold Grey / Citadel Dawnstone / Army Painter Uniform Grey.
- Black – Any black will do.
- Light Beige Grey – Citadel Terminatus Stone / Citadel Karak Stone / Rakarth Flesh / 2:1 Vallejo Khaki & White.
- White – Any white paint.
- Washes – we used Citadel ones but you can use any you have. Vallejo and Army Painter also make great washes. You will need: Brown, Black, Flesh (plus optional: Red, Green, Sepia).
Static Grass – Optional but highly recommended finishing touch.
Spray Matt Varnish – Pulls all of the colours together, removes shine from washes and adds a little protection. We use Army Painter Anti Shine in a spray can or AK Ultra Matt Varnish through an airbrush.
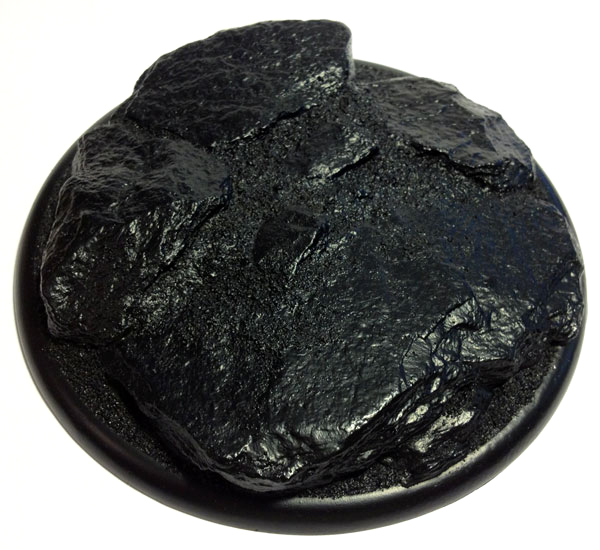
Step 1 – Primer
Spray the rocky item in your choice of undercoat colour. We went for black. It came out a little glossy in the picture but that’s ok. These techniques are rather messy and we’ll be adding lots of layers over this one.
Step 2 – Painting the Earth
Paint the earth (soil, mud, whatever you want to call it) in a nice dark brown colour.
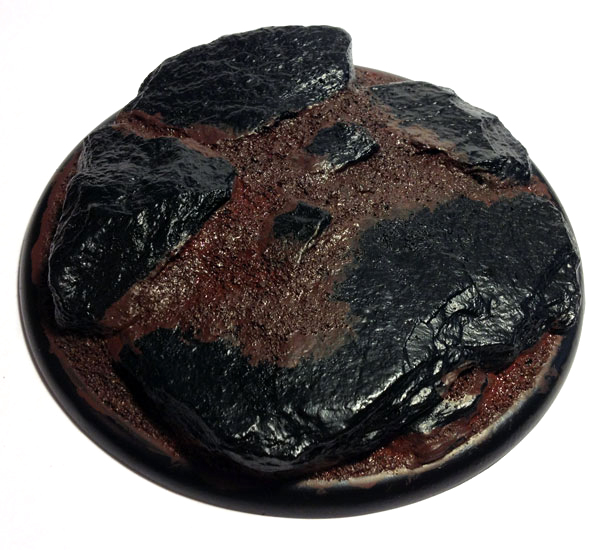
Drybrush the earth with a lighter brown.

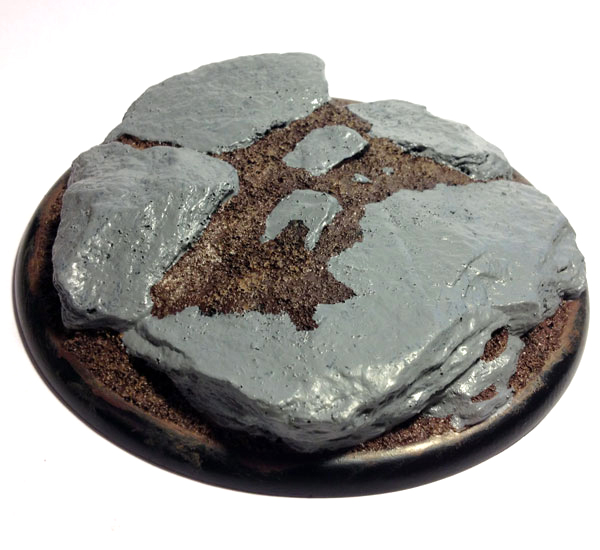
Step 3 – Painting the rocks
Paint the rocks with a good solid coat of a medium grey colour. You may need to use several layers to get a nice even coat. Make sure all of the paint is nice and dry before moving onto the next step.
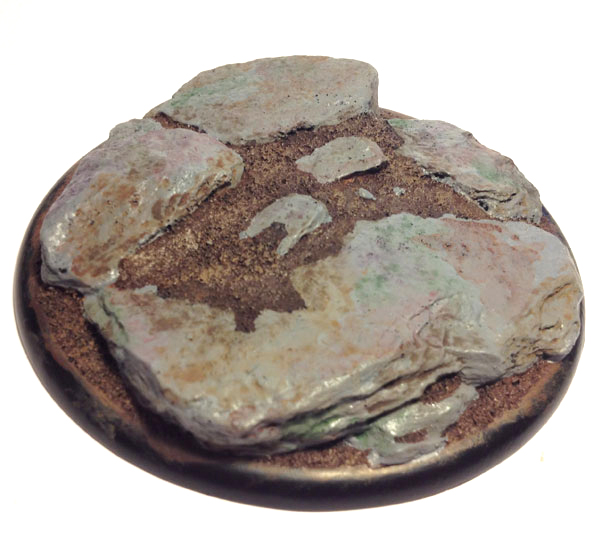
Step 4 – Adding some colour
Now for the fun bit.
Grab your washes. All of them except the black one. Load up an old brush with a drop of wash (you choose which one) and dab it in a few spots on the rocks. Repeat with all of the washes until you have a really odd looking multi-coloured rock. Don’t worry about making a mess or a little pooling, it’ll be fine.
Leave these washes to dry thoroughly. Go have a cup of tea or a few beers.
Step 5 – Adding some shadows
Now for the last part in our wash extravaganza. The black wash. Go ahead and grab your chosen black wash and slop it all over the place. Rocks, mud, everything. We want enough to cover the whole lot but not enough to make it too dark. You may need to add a few drops of water to your wash to help it cover better.
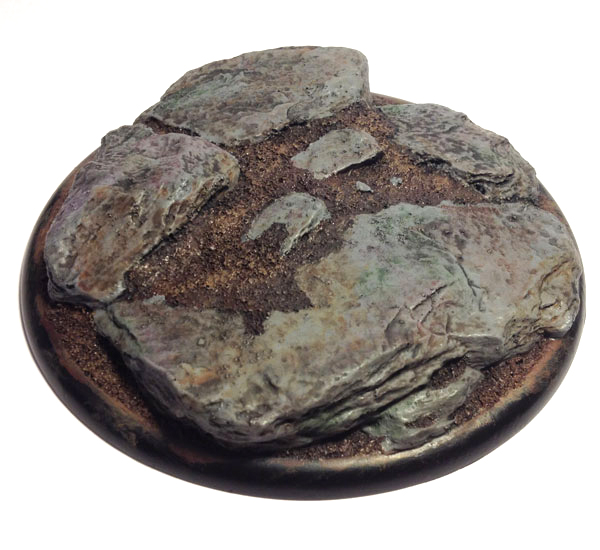
Now you may be thinking… damn, that looks ugly. You’re right, it does. Don’t worry, you haven’t done anything wrong. We’ll make it look nice over the next few steps.
Step 6 – Highlights and colour management
Now that we’ve got our rocks looking a bit crazy ugly with our washes it’s time to tone down all that colour and add some highlights with a spot of drybrushing. If you don’t know how to drybrush… load your brush, then wipe most of the paint off on a paper towel until only a small amount is coming off the brush, then brush across the model leaving very little paint, only on the high spots. If in doubt, Google it and there are a million tutorials on it.
The first colour we will be drybrushing with is the same grey we used for our basecoat. Give all of the rocks a mid-heavy drybrush with this colour. You should still be able to see the colours from the washes but they shouldn’t be quite as bold.
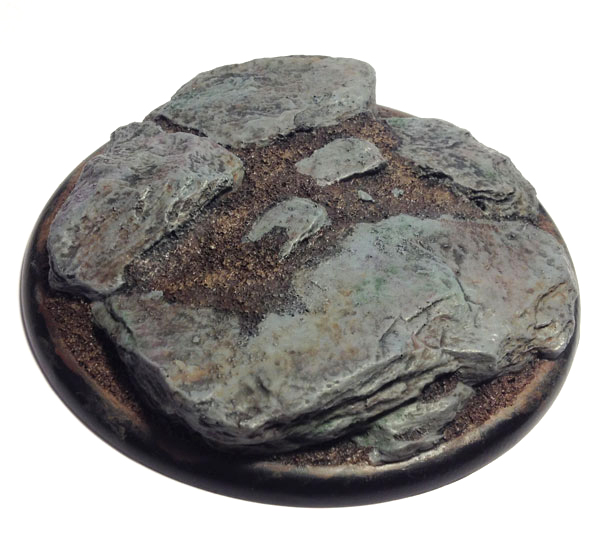
Next we grab the Terminatus Stone (or other light beige colour). Give the whole base (mud and all) a light drybrush with this.
Lastly, give the rocks a very (very.. you hear me?) light drybrush with pure white, picking out only the corners of the rocks.

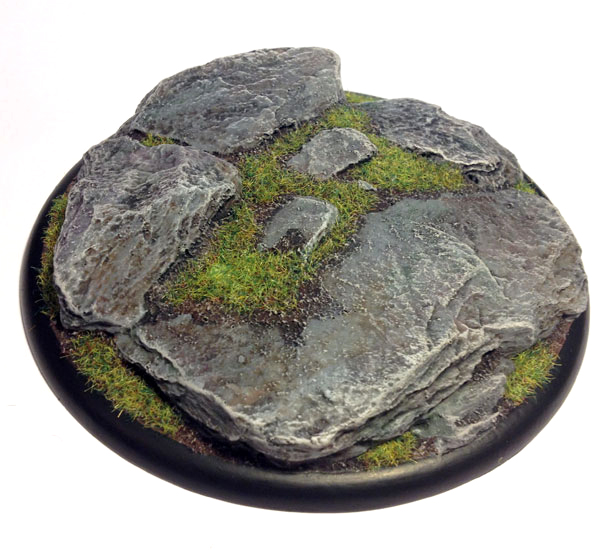
Our rocks are finished. All that remains is to add a few finishing touches and we’re all done.
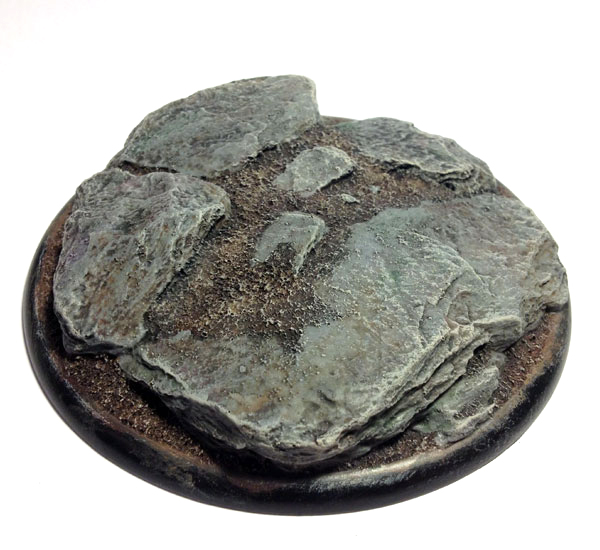
Step 7 – Finishing Touches.
To finish off our base we painted the rim of the base in black. We also added some Summer Pasture static grass. These are optional steps that may not apply to certain pieces depending on what you’re painting.
Finally we gave the whole base a light coat of spray matt sealer. This, as far as we’re concerned, is not optional. The matt sealer helps to pull the colours together and eliminate any shine from the washes.
For a gaming piece you may want a coat of gloss varnish before the matt sealer for protection. Be sure to do this before adding static grass or the gloss will cause the grass to stick together. You can use matt sealer after adding the grass.

We hope you have enjoyed this tutorial and that it has shown you a simple way of painting rocky terrain for your games. If you have any questions or comments, please drop them below and we will be happy to answer them.